19 november 2017
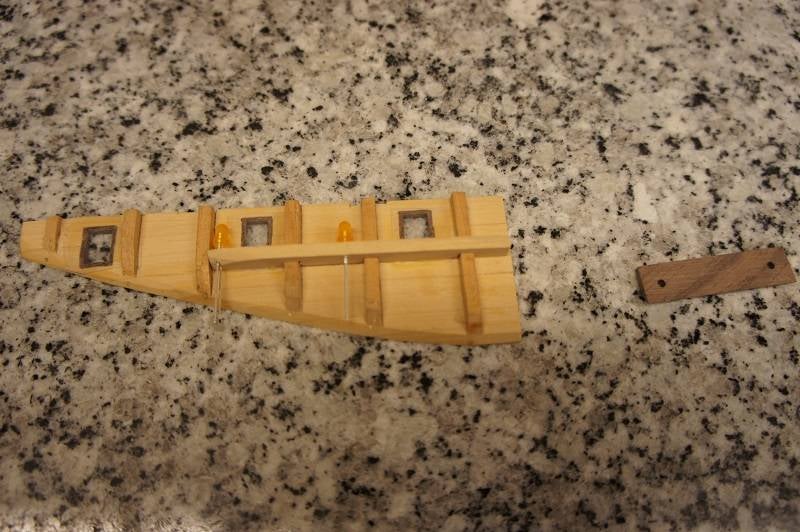
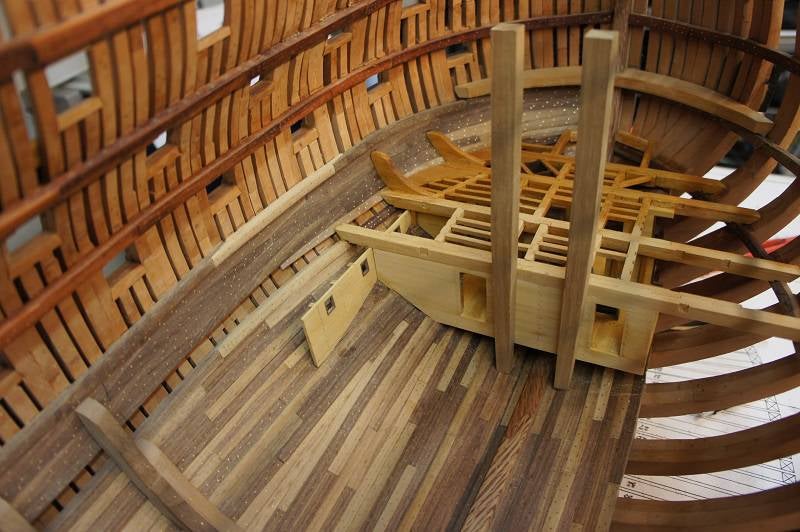
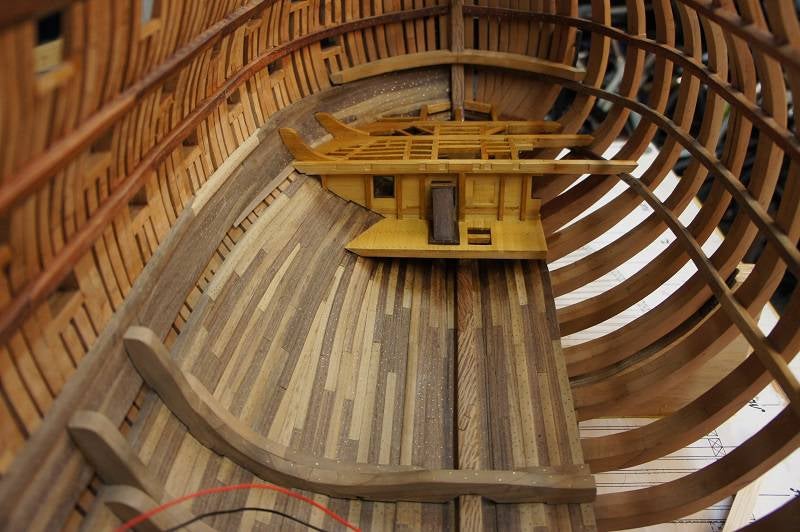
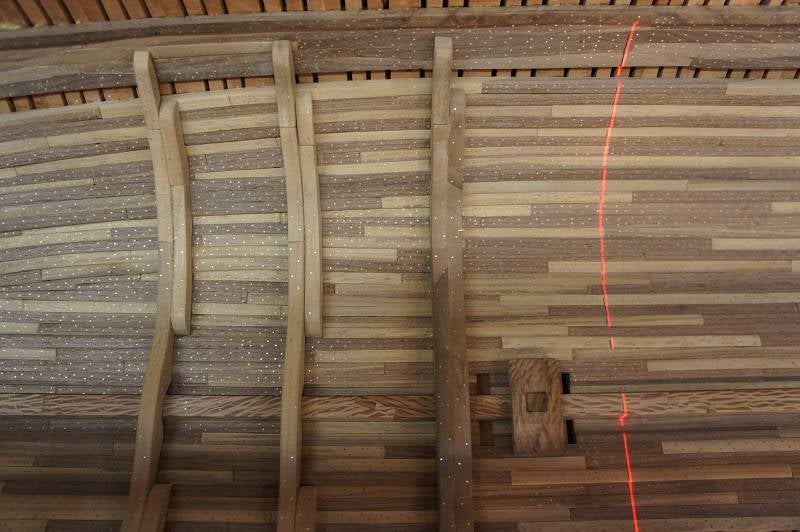
The side wall of the Filling Room and Main Room is now equipped with 2 LED lamps. I am going to work with indirect and direct lighting. In the case of indirect lighting, the LED lamps are clogged. This way you don't see them sitting and only the light is visible. In direct lighting, I work with LEDs in oil lamps. Behind the scenes I am already designing it.
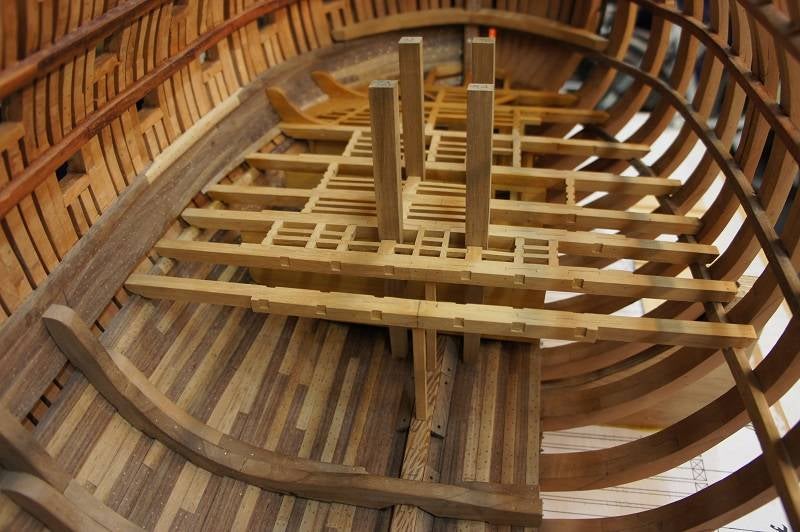
The deck beam, under which the partition wall will be placed, is positioned and the partitions are also largely ready. Just make them fit and then they can be placed. This can only be done after the side wall is placed with lighting. Brother-in-law Rob comes by this week to explain everything, etc. I don't have so much understanding of electricity.
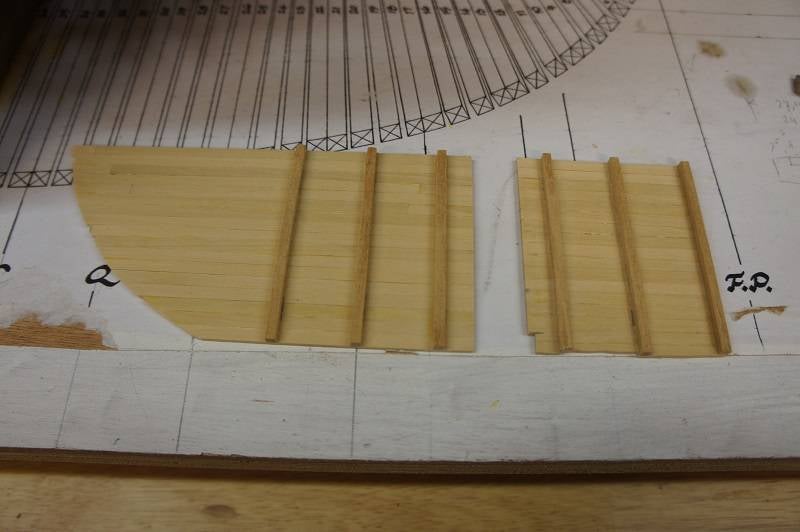
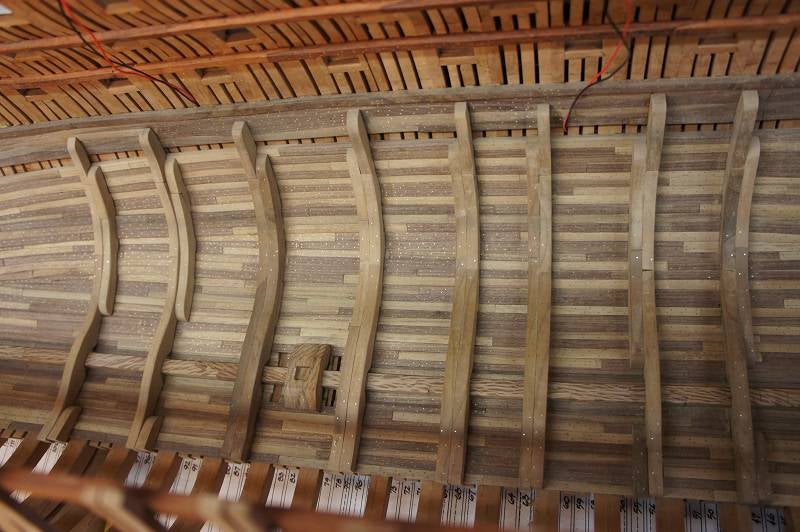
Finally, I made a number of cover shelves for the drainage channel. These are at an angle and lean against the keel. These boards ensure that the gutter remains clean and can do its work. In addition, they could easily be removed to clean the gutter.
_______________
regards,
Henk
12 november 2017
The double floor and the rear wall of the Main Room are finished. The side wall is ready, but the lighting still has to be on it. As soon as that works, I can place it and finish off the deck construction above it.
The next project will be the installation the frames of the second anchor bitt, the dividing wall between the front and middle hold and the finishing of the deck construction above the front hold. I do wrestle with the positioning of the ledges between the trusses on the starboard side. These severely restrict the view diagonally downwards. For the time being, I do make the cut-outs for these ledges, I can always place them later if they are still present.
For the time being, I am satisfied with the view to the inside of Vic. I try to get them as good as possible on the photo, but the image never gets better than in real life.
_______________
regards,
Henk
5 november 2017
To enter the Filling Room, a fixed staircase was used from Orlop Deck. This had to be manufactured. You will spend an afternoon, but then you have something. Meanwhile, the wall between the Filling Room and the Main Room has been placed and the deckconstruction is largely ready.
On the fourth fofo you can see the side wall of the Filling Room and Main Room and in this wall there are 3 windows. Jan Zwart and I wondered what these windows would serve. Our conclusion was that lanterns were hung behind these windows to illuminate the rooms. After 1805, everything was rebuilt and the front room was changed to the current Light House. I am still waiting for a few parts and then we can put some light points behind these windows. Then I can finally try out the electrical system.
An Riding Bitt is placed on the Lower Deck at section M and Q. The frames of these anchor bitts run straight down through the Orlop Deck and stand on the floor of the hold. At section Q, where I am now, they also walk through the floor of the Main Room.
So there are several small projects running to bring everything together, enough to do so
_______________
regards,
Henk
28 october 2017
The deck structure above the front room is ready. I immediately oil the parts with Tung oil, because I can't get there later. Tung oil has the advantage that it pulls directly into the wood and completely dries up, so it remains dust-free. The oil also gives the wood a deeper and warmer colour.
Now that the front part is ready, you can clearly see how a person could come from one part to another. We have therefore decided this afternoon not to lay any boards on the decks. These take away all visibility completely and in the current way everything remains visible.
Quiet further.
_______________
regards,
Henk
23 october 2017
The Filling Room floor is finished and the ventilation channel fits perfectly. It was a big job to have the ventilation chennel properly connected to the deck construction of the Orlop Deck. It now runs to the top of the deck construction.
From now on I work in the system that I first build the rooms and parts in the hold, after which I immediately follow the deck construction.
To make my shelves to measure, I always used a thicknesser. This goes well up to a certain thickness and width. This machine often went wrong with the thin and narrow planks. Due to the hardness of the wood, the wood often smashed or it did not get evenly flat. I had been looking at a Thickness Sander for a while, but it has to come from afar (Orlando USA). However, I could not find a supplier any closer.
My wife recently asked me what I wanted to have for my birthday, so I had something in mind. I was able to motivate well why I want this machine and what I am going to use it for. This afternoon, after a long journey, he is delivered neatly. I put it into operation immediately and put it to the test.
The machine works perfectly, so I am a very happy model builder; -)
_______________
regards,
Henk
15 october 2017
The decision to build Vic as she was before 1805 gives extra preliminary research, but is very nice to do. Meanwhile, the walls of the front room are ready and everything fits. The front room has 2 ventilation channels running through the front room and the part that runs through the front room is ready. I leave it with one ventilation channel because then the view in the rooms remains good. If I place 2, it becomes too full and you see nothing more.
The next project will be the floor of The Filling Room and then I can connect the ventilation channel to the floor. Then I can connect the front part of the ventilation channel to the Orlop Deck's deck construction, install the deck beams, etc.
I'm finally back in a good rhythm to align building and drawing, to be continued.
_______________
regards,
Henk
4 october 2017
The first 2 decking beams have been assembled and placed on the beam weighers of the week. It took almost a whole day before the first decking beam was placed, but it is now in the right place. Somehow or other, I never trust myself when placing the first part and I have to check everything up to ten times.
The decking beams are equipped with the necessary recesses for the intermediate beams, knees, etc. These are not placed until the rooms underneath are ready. I now have enough space to fit the ventilation ducts. Today the floor of the front room made ready, this one now fits perfectly in the hold. I now have the basis to build the walls and the other rooms.
_______________
regards,
Henk
4 october 2017
There are times when you have all sorts of questions and would like to discuss them widely. It's not about how I have to build something, but rather why it should be built like this. Luckily, on the other side of our village lives Jan Zwart and he knows a lot about Vic.
Last Monday I was with him last Monday with various books and drawings. We spent almost an hour talking about 3 rooms that are approximately 75m2 together. My questions were mainly about the air ducts, why others build it differently from the drawing, what about the lighting, etc.
According to Jan, the year 1805 is of great importance on the drawings and the execution as it is now indicated on the real Vic. The current situation on the real Vic dates back to 1805 and before that there were various parts/spaces/spaces/etc. etc., different in each other. Last Monday we came to the conclusion that John McKay's drawings reflect the situation before 1805. Meanwhile, I have received more and more reports that this is the case.
After this conclusion, the discussion became more and more enjoyable. Why then were the air ducts removed? What about the lighting? How to get into the rooms, ect.?
It turns out that the current Light House for 1805 was not a Light House, but rather a storage space. The lighting had to be controlled by windows on the side of the rooms. The air ducts were intended to keep the space underneath the rooms dry, after 1805 did with that by placing coal in the double floor, there is still a staircase to be built, and so on. In short.... after 1805, these rooms are decorated differently.
So it was clear that I had to make a choice about what situation I would like to show in Vic, that of before or after 1805? We are both agreed not to combine situations before and after 1805, as others sometimes do. Although this Monday has become much clearer, I still had a lot of questions for myself. The floor of the Main Magazine is much more beautiful after 1805, The Lihgt House is more beautiful, etc.
Yesterday evening I had a meeting with my wife about the types of wood to be used, in which the above questions were also mentioned. We have jointly decided to present the situation before 1805, in accordance with John's drawings. Reason for this....... Because we don't know that someone has done it that way and that makes our Vic unique again!
So I immediately started to build up a large stock of wood. The beam construction of the decks and trusses of the rooms is made from Swietenia Macrophylla King and the shelves of the rooms of Ivory Wood. So we are really starting now.
_______________
regards,
Henk
24 september 2017
All drivers are now placed and the last breasthook on the front of the hold is also placed. I will now from the bow onwards continue to decorate the hold and work towards the back. The best way of working is to start 2 projects now, namely the layout of the hold and beam construction of Orlop Deck.
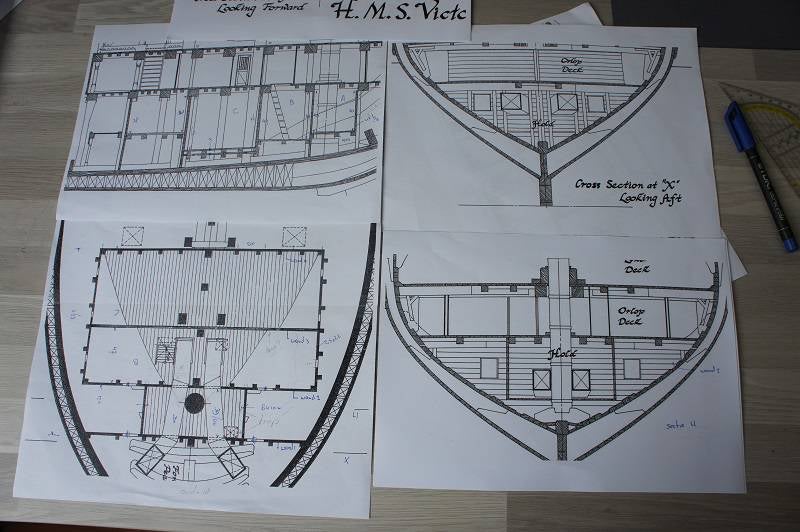
I have the drawings of the beams of each deck. You can see that the beams are made up of several pieces. On the drawings these are shown out of straight lines, but in reality they are not straight. The pieces all have connecting surfaces that interlock together, making the construction stronger. Now you could make a template for this, but Mc Gowan's book indicates that there are 8 different types of beams. You could consider putting a whole series of beams together in the same way, but the drawings indicate that all beams are different. The pieces differ per beam. You know me by now, so it is going to be a lot of calculations and signs. In the meantime, I'm going to make a stock of wood with different sizes and thicknesses for the beams.
The other project will be to set up the rooms in the hold. In the front part, The Light Room, The Filling Room and The Main Magazine will be presented. Now John's drawings contradict each other and show a section of the side of the picture that is different from a top view. In Mc Gowan's book, even a wall has been completely lost. I don't like it yet, I want certainty before I really start.
Next Monday I will visit Ome Jan Zwart with all the books and drawings. If someone can tell me, he is.
Continued
_______________
regards,
Henk
24 september 2017
At this moment the first three double drivers are placed. A total of 8 double drivers must be installed. To measure them correctly, I use my laser, so that they can be placed exactly where they are right.
Last week I have already been reminded a few times of not sanding everything in the hold too smooth. My wife commissioned me to let the hold live, the hold is not a ballroom.
________________
regards,
Henk
17 september 2017
I still have to find my rhythm, it is getting used to not doing the same thing weeks in a row. A few more planks and then the Orlop Deck wall is finished. The Breasthooks are ready to be placed, only sawing the underside.
Because it all runs well, I forget to do the other preparatory work. Suddenly I can start with the knights and I had nothing on paper. So this afternoon put everything aside and done the preparatory work for the riders.
Now I have had the drawings scanned. In this way I can print the parts separately, place them on top of each other, enlargement/reduction, etc. First of all, I have picked up which riders go through to the Orlop Deck and which ones stop in the hold. Then the knights printed on thick paper so I can cut it out and put it over on the wood.
________________
regards,
Henk
10 september 2017
Now that the outside of the hull is ready for the time being, I can finally start with the decoration of the decks. In the past few days I have been working on redesigning my workshop. In the previous projects, I was able to prepare a large stock of a wood species and use it for months. When it was over, I replenished it and continued production.
This is different when designing the decks. The various components are made from different types of wood and differ in thickness and size. So first I have picked out everything and cut my entire stock of wood to 1 length. In addition, I now have a large number of storage bins that contain a type of wood per tray, call it a large and small warehouse. After that, I hung the right drawings in the workshop and then I can finally start with the project' Hold Fitting'.
Now the hold must first be provided with extra reinforcements, the Breasthooks in the bow and the Riders. I started with the Breasthooks. The first one has now been placed, 3 more to go in the hold and 2 in the Orlop Deck.
The problem with the Riders is that they run through to the Orlop Deck and so I now have to start with the planking of the Orlop Deck wall. The Orlop Deck's planking does not consist of normal parts, but of boards of the' Top and Butt' type. I apply 4 rows of top and Butt planks and 1 row of normal planks below. I then have enough space left to connect the deck beams and waterway to the frames. I have enough planking on the fuselage of Orlop Deck to make sure the Riders are properly connected.
To be continued
________________
regards,
Henk
