17 february 2019
I try to update this site every two weeks. It has taken a bit longer now because I had to prepare a few parts and there is now also a 2nd workplace furnished. The gate valves are now equipped with the hinge hangers, including the necessary eye pins. They are not yet attached to the hinge pins, I only do this when the guns are placed and then I finish them immediately.
As mentioned before, we decided to equip the guns with 'Breeching Rope' and 'Tackles', however to hang the gate valves properly, the operation of these valves must also be made. This operation consists of several blocks and ropes. Now wood and rope don't really go together and I really needed an extra space where I can make small parts, like hinge hinges, eyes, hooks, etc.
Now I still had the work table on which I built the Vic 1:72, I use it to make drawings, etc., In the past weeks we have decorated this space to do the ropes and make small parts. First I fitted all the guns with a breeching rope including the eyes and pins to attach them to the wall.
I also made a mould where I can put the tackles of the guns on. I have now consciously chosen to leave the rope part, which is pulled on, straight and not, as many colleagues do, to roll up nicely. In the book 'The Trafalgar Companion' it is explained step by step who, what function the cannon had when it was used and what its position was. The rope was explained in a straight line here and the operators of the cannon positioned themselves behind this line.
Finally I made a mould to operate the gate valves. The first sets are now ready. I will now continue with the design of the Lower Deck and also the deck construction of the "Middle Deck" is included. The guns and hatches are then fitted one by one and in between I can make another set of new tackles, etc.
________________
Regards,
Henk


20 january 2019
The external planking is ready. Everything is planked to the correct height. I have decided to install the mouldings at a later stage and now first continue with the port gate lids. I must admit that this is a pretty time-consuming job. Not bad, next Thursday I will be working on this project for 4 years and I expect to be working on it for another 15 years.
The lids are made one by one to fit on every gun gate. Because the wales run across the gun gates I start with a thick lid that is completely milled and sanded in the right shape. In this way the wale runs through the port gate lids. In addition, the lids on the inside must fit well to the rebates. I am now on half of the port gate lids of the Lower Deck. Still 8 to go and in the meantime I will start with the hinges of the lids.
________________
Regards,
Henk


6 january 2019
The planking of the outside of the hull continues slowly but steadily. With an altimeter I set out all the necessary lines. On the line I place a steel ruler so I can fit the planking nicely against it.
On the fourth photo I put a bottle of Cava next to the hull, so it is more visible how high Vic will be. The hull at the back is now more than 37 cm high.
In the hull, according to the drawings, 2 sheaveholes are placed. I expect to planking for at least 2 more weeks and then I can start making the mouldings. To be continued.
________________
Regards,
Henk


23 december 2018
It is the intention that the guns stick through the gun gates, I want to depict the so-called combat position. This puts the shutters of the Gun Ports in an open position and actually they are the most vulnerable. The outside is not yet completely finished and I want to work as little as possible above the hatches. Sometimes something falls down and you will see that this always falls on a hatch, so it will certainly break off.
So for the time being first put the planks on the outside.
________________
Regards,
Henk


6 september 2017
It went a bit faster than expected. The upper wale is placed and the last rows of satinwood have been placed for the time being. Today everything is sanded for a while and I gave the hull a low oil. Nothing can happen now with the ebony wood anymore!
Vic has been turned so that I can start with the layout of the hold. This blog is therefore provisionally closed and I start a new blog for the hold.
Vic is going to be placed under a sheet for a few days, so that the oil can be pulled into the wood and dry well. In the meantime, I'm going to work on changing all the drawings and preparing the workshop for the furnishing of the hold.
________________
Regards,
Henk


2 september 2017
The yellow plane between the middle and upper wale is ready, Vic is now a very impressive lady. She is going to look taller and taller. There is now at least one ship in the workshop.
In the coming weeks the upper wale will be placed and I'll probably place 1 or 2 rows of satinwood above it. Then the outside is sufficiently constructed for me for the time being. I can't go any further either because I have to install the sheaveholes first. These are provided with brass discs and I have unfortunately not found a good lathe yet.
There are enough lathes on offer, but for me they are too big, too old, etc. In terms of machines, I am very choosy and I'm not going to buy an expensive machine for 8 drives only. I wait with those discs until I have more work to do for a lathe and I am quietly looking for a good lathe. In the meantime I am going to finish the interior of the hold further. Work well enough
________________
Regards,
Henk


25 august 2017
The middle wale is ready, it went well soon. This afternoon loosened the last clamps, sanded everything and gave a thin layer of oil. What is noticeable is that the lemon wood is becoming pretty yellow. I placed the first shelf above the middle wale and you immediately see the big difference.
There are 5 layers of shelves between the middle and upper wale. So I can go ahead for a moment.
________________
Regards,
Henk


19 august 2017
It has been a bit different with the copper plates. After all the pictures were cut and I had some holes, I first put them on the trunk. Now, because of the electricity in the hull, I can make a strip of copper plates of about 18 cm wide. It has not come so far.
My wife noticed my mood the day I put them on the trunk. Although everything looked good, I was still getting grumpy. The reason was that I did not like the section with copper plates. I polished them, brushed, tried everything ..... In my eyes, it remained a wrong spot on the trunk that broke the entire image of the trunk. Eventually, we decided not to place the copper plates (for the time being).
Now, copper plates have not always been on Vic's hull and can you use it as an argument. I do not do that, it just does not look good. Well, if the hull would be completely fitted with copper plates, then it is not possible now.
So I put her back in the other mold and I continued with the level between the lower and middle wale. Meanwhile I made the beams ready for the middle wale. The first one I will place tomorrow and so we start with the middle wale.
________________
Regards,
Henk


12 august 2017
Last week a I was a couple of days free and so I was able to run a nice production. The short pieces of Wales on the starboard side are ready. Because the copper for the plates was not yet inside and the bending took quite some time, I started the planking between the lower and middle Wale. I use Satinwood, this wood is yellow and I use it to make the yellow surfaces.
Yesterday, the copper finally came in, so I put Vic back on the other mold. I started to close the underside of the rearview. Because it's got to be black, I'm using Ebony. Once this part is closed, the backs of the lower Wale can be finished.
Meanwhile, preparations for copper plates have been started. I will be back next week.
________________
Regards,
Henk


4 august 2017
I have to bend / place another plank and then the bottom wale is ready on this side. The back of the wale is not updated until the shelves are placed under the rear mirror. I do that with placing the copper plates.
To prevent the ebony from splitting, I have the wood with 1 layer of Tungoil. After a long search I found a good Tungoil and with this oil all the wood will be finished.
As soon as this side is ready, I get started to put the mountainwood on the other side. These are short pieces at the bow and back.opper plates
________________
Regards,
Henk


28 july 2017
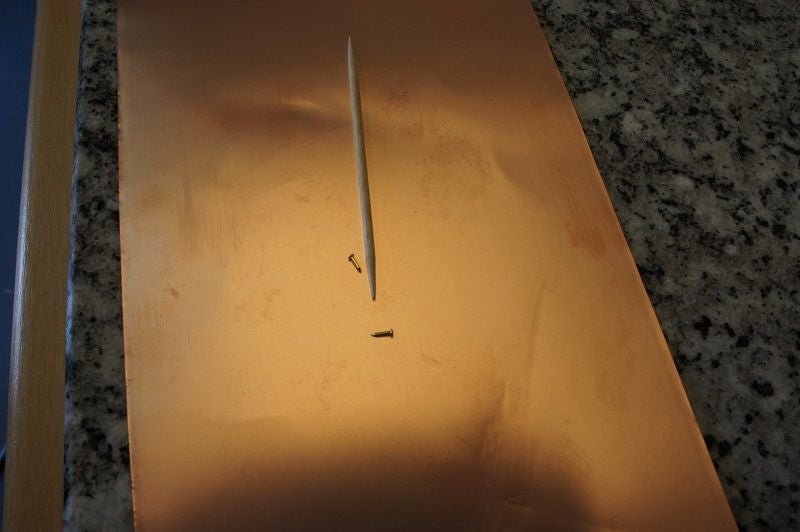
The copper plates and brass nails are inside. It is the intention to make the copper plates of thin copper and for that I ordered 0.1 and 0.3 mm thick copper. Now it seems 0.3 mm in practice to be too thick and 0.1 mm is too thin. If there is a grain and you rub it over, you'll see it right back in the plate. I have to search a lot, but I have finally found copper plates of 0.2 mm thick. Unfortunately, the extradition due to the holiday takes 3 weeks.
Meanwhile, just working on the the lower wale. Now working with Ebony wood is new to me again and I have had the necessary learning moments. The wood is very hard and bending costs a lot more time than thought. The planks of the wale are about 6 mm thick and in order to bend them well, I first water them for 24 hours and let them steam them for 3 to 3.5 hours.
A few years ago we conducted a great discussion on a forum on how the 'Gun Ports' connect to the planks of the hull. I'm following the drawings by John MCKay, which is the same as we concluded at the time. The 'Gun Ports' will later be fitted with a shelf that goes over the planks of the hull.
Meanwhile there is already a lot of ready for the lower wale it is fitted with brass pens.
________________
Regards,
Henk